
Happy Wednesday Dear Crafters,
Shilpa here,
Confession !!
We are amazed by all your creative entries for
Challenge #27
Lulupu 2nd Birthday Celebration
Today, I've created something special to inspire you more. It is a paper patchwork with stencilling. Lulupu store has got new Memory Box stencils, and I couldn't wait to use them.

Confused? this is a part of Wall Art Piece, scroll down to view full image.
Before that, let's see the process and few techniques..
 To start, I kept the stencil on piece of white paper (card stock).
And attached the edges of stencil to my craft mat with washi tape, so it doesn't move while colouring and gives crisp image.

Confession !!
We are amazed by all your creative entries for
Challenge #27
Lulupu 2nd Birthday Celebration
Today, I've created something special to inspire you more. It is a paper patchwork with stencilling. Lulupu store has got new Memory Box stencils, and I couldn't wait to use them.
Confused? this is a part of Wall Art Piece, scroll down to view full image.
Before that, let's see the process and few techniques..
And attached the edges of stencil to my craft mat with washi tape, so it doesn't move while colouring and gives crisp image.
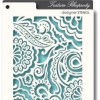
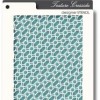
I created this piece with Texture Rhapsody stencil and Gelatos colours-Pistachios,Green Tea.
For this technique, place the stencil on paper, fix it with washi tape/masking tape, apply Gelatos, and spread the colour through stencil with baby wipe. You can do shading with same colour or use different colours.


Here, I've used Memory box Texture Cressida stencil and Salty ocean distress ink. I applied the ink with ink blending tool, very easy technique for quick backgrounds.

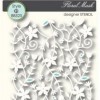
Lovely design, isn't it? Stencil name is Floral Mask. I applied Picked Rasspberry distress paint with sponge here.
Trick for this technique is, take little paint on sponge and pounce back on the mat 2-3 times and then apply. You can use any acrylic or water colour paints.
And when I put together all on one chipboard, it came out something like this... check it out...

How is it?do you like it?
You may ask, how did I get this effect, let me explain in short.

To give the finishing touches, I used distress inks at the edges and brought bit inside the page too, remember how Tim Holtz does this? And when I adhered all pieces together, I applied Vintage photo distress ink to all four sides, it gives the depth.
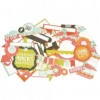
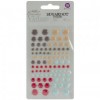
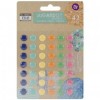
Embellishments - Die cut collectables are from Spring Bloom (Kaisercraft), metal trinkets, Prima sugar dots (red and sky blue), Tim holtz Tattered leaf die cuts, flowers.
So...what are you waiting for? grab new stencils and colours and try these techniques for wonderful backgrounds. Create card, Scrapbook Layout or any mixed media piece and show us at our current challenge # 27
Challenge ends on March 31st.
or
on Lulupu facebook page,
.
Can't wait to see what you create!!
Lots of Love,
Shilpa
For this technique, place the stencil on paper, fix it with washi tape/masking tape, apply Gelatos, and spread the colour through stencil with baby wipe. You can do shading with same colour or use different colours.
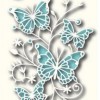
These two pieces are done with Crafters workshop Fancy Feathers stencil + LSG Bachelor Button Blue and Memory box Butterfly Vine stencil + LSG Poinsettia Red Gold respectively.
While using any spray with stencil, keep spray at one foot distance, be confident, and spray from one end to another. Ink will spread evenly and it won't puddle.
Lovely design, isn't it? Stencil name is Floral Mask. I applied Picked Rasspberry distress paint with sponge here.
Trick for this technique is, take little paint on sponge and pounce back on the mat 2-3 times and then apply. You can use any acrylic or water colour paints.
And when I put together all on one chipboard, it came out something like this... check it out...
How is it?do you like it?
You may ask, how did I get this effect, let me explain in short.
To give the finishing touches, I used distress inks at the edges and brought bit inside the page too, remember how Tim Holtz does this? And when I adhered all pieces together, I applied Vintage photo distress ink to all four sides, it gives the depth.
Embellishments - Die cut collectables are from Spring Bloom (Kaisercraft), metal trinkets, Prima sugar dots (red and sky blue), Tim holtz Tattered leaf die cuts, flowers.
Challenge ends on March 31st.
or
on Lulupu facebook page,
.
Can't wait to see what you create!!
Lots of Love,
Shilpa
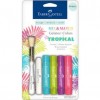
Supplies used:


Superb Patch work Wall Art, Shilpa...Love the way it has turned out...Pretty splash of colors collage and the distressed edges of chipboard do enhance the colors to pop out :) Thanks for sharing ur ideas and tips!!
ReplyDeleteBeautiful shilpa...you got me thinking now.
ReplyDeleteAbsolutey amazing Shilpa. This is so inspiring, Whenever I see a brilliant tutorial like this, my hands itch to try it soon. Gotta buy some stencils now ;)
ReplyDeletelovely work...loved it,,,it had given me a lot of insipration to use my stencils...i will try it soon
ReplyDeleteIts absolutely gorgeous work Shipla ..I just love the beautiful collage of the stenciled panels you have created and your choice of colors too ..Its all come together so beautifully !!
ReplyDeleteBeautiful card!
ReplyDeleteLovely piece of art Shilpa !
ReplyDeleteThis is an awesome collage, the stenciling looks coool !!!
ReplyDelete