
Hello everyone!
This is Indira here with a tute to upcycle a cardboard box. Incidentally, it also showcases the fabulous use of washi tapes, which is our highlighted product for this month. But yeah that is just a mere co-incidence. I will be back again with another post for washi tapes.
On to our post for today.... I made this cute and large storage box for a friend of mine. She wanted an empty box to store some goodies and gift it to her hubby.
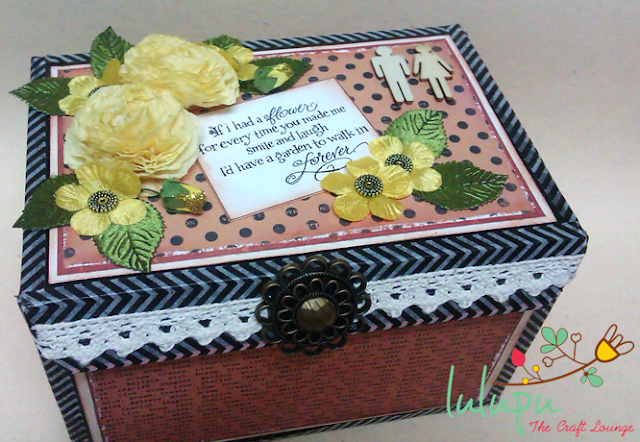 The image below summarises how I made the box, but I would like to highlight some important points and tips. Coating the box with paint makes it sturdier. There were some imperfections at the edges of the box, and thus came the idea of concealing them with the beautiful Zebra stripes washi tape, available at Lulupu. I have trimmed the inner flaps of the box to make it look more spacious and taken the flap of the lid outside. I thought it will be a good idea to decorate the flap and will also lend a different look to the box.
Coverering the box with paper mats was such an easy task with Mod Podge and I kept looking at it again and again as to how neatly the paper sticks to the box as compared to when we use a normal glue. Earlier when I used glue to stick papers on a hard surface like this, they always kept coming off from some place or another. But now thanks to Mod Podge, my worries are gone :)
The paper stack that I have used for the top, front and back is Tigerlily from Kasiercraft. I love the contrast that this particular paper stack offers. It has the soft pinks (that I used for the valentine card) and also these dark vintage looking rust colored papers. Totally love it :) To co-ordinate these I used Zephyr paper pad for the sides. The texture of this paper pad is just so cool. They look like handmade pattern papers.
 To decorate the flap, I used washi tapes for base and then topped it with fabric tape. It's again a very useful and easy to play with product. I no longer have to worry how to stick fabric laces onto my projects. They just come in so handy and enhance the look of the product so well. I added a vintage button onto it.
Here comes the surprise. Do you know how I kept the flap in place? It kept opening up so I decided to use another wonderful product from Lulupu..... the magical velcro dots. Here's a closer look!

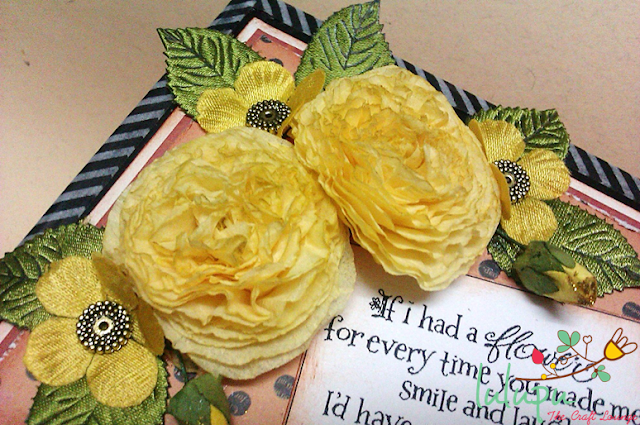
As a bonus I am also going to show you how I made these pretty carnations :)
This is Indira here with a tute to upcycle a cardboard box. Incidentally, it also showcases the fabulous use of washi tapes, which is our highlighted product for this month. But yeah that is just a mere co-incidence. I will be back again with another post for washi tapes.
On to our post for today.... I made this cute and large storage box for a friend of mine. She wanted an empty box to store some goodies and gift it to her hubby.

Coverering the box with paper mats was such an easy task with Mod Podge and I kept looking at it again and again as to how neatly the paper sticks to the box as compared to when we use a normal glue. Earlier when I used glue to stick papers on a hard surface like this, they always kept coming off from some place or another. But now thanks to Mod Podge, my worries are gone :)
The paper stack that I have used for the top, front and back is Tigerlily from Kasiercraft. I love the contrast that this particular paper stack offers. It has the soft pinks (that I used for the valentine card) and also these dark vintage looking rust colored papers. Totally love it :) To co-ordinate these I used Zephyr paper pad for the sides. The texture of this paper pad is just so cool. They look like handmade pattern papers.

Here comes the surprise. Do you know how I kept the flap in place? It kept opening up so I decided to use another wonderful product from Lulupu..... the magical velcro dots. Here's a closer look!

As a bonus I am also going to show you how I made these pretty carnations :)

I guess it is one of the simplest DIY flowers and with bare minimum supplies anyone can make them. 

This is just gorgeous Indira. thanx for the tute too
ReplyDeletehttp://www.kalasirjana.blogspot.in/
this is very pretty.. loved the carnation tute.... :)
ReplyDeleteHow lovely the box has turned into !!!.. Did u spray paint on the tissue paper or it could be painted with water colours ??
ReplyDeleteHappy to follow Lulupu
happyexperimenting.blogspot.com
What a beautiful box Indira ..loved the way you have upcycled it ...and Thank you so much for the tutorial..really so well explained :)
ReplyDeleteFabulous up-cycling of the box and lots of info about interesting products. loved how you have decorated the box n thanks for the tut.
ReplyDeletesuperb upcycyling of box.flower tute is awesome.
ReplyDeletewow....flowers look so good.its easy too..thnks fr the tut :)
ReplyDeleteLoved the box...great upcycling...well explained tute,Indira...
ReplyDeleteI am using shoe boxes for storage as is and was thinking of decorating them. Thanks for your informative tutorial Indira and that too just at the right time. :)
ReplyDeleteI would love to have you visit my blog Thrilling Quilling
Nupur
really interesting ...superb box with yellow flowers..
ReplyDeleteSuper box. I really like your box design..
ReplyDeletePaper Napkins